To revive dried-out beeswax wraps at home, we can preheat our oven to 180°F. Then, we lay the wraps on a parchment-lined baking sheet, sprinkle with beeswax pellets, and heat for 1-2 minutes until the wax melts. After cooling, the wraps regain their stiffness and stickiness. If they still don’t cling well, consider rubbing with a beeswax block or using a hairdryer. Keep going, and you’ll discover more about caring for our wraps!
Key Takeaways
- Preheat your oven to 180°F, then lay your wraps flat on parchment paper and sprinkle with beeswax pellets for revival.
- Heat the wraps in the oven for 1-2 minutes until the wax melts, ensuring you monitor closely.
- Alternatively, rub a block of beeswax directly onto the wrap or use a hot hairdryer to melt and redistribute the existing wax.
- For another method, press the wrap between parchment paper with a low-heat iron to reinvigorate the wax coating.
- Always clean your wraps before revival to eliminate bacteria and ensure effective restoration.
Understanding Beeswax Wraps: Why They Matter
When it comes to food storage, how often do you reach for a plastic bag or wrap? It’s such an automatic choice, but there’s a much better option out there. Enter beeswax wraps—an eco-friendly alternative that helps cut down on plastic waste. These wraps are made from organic cotton, beeswax, and natural resin, creating a breathable seal for your food while giving off a delightful aroma.
One of the best things about beeswax wraps is their longevity. They can last up to a year with regular use! However, don’t be surprised if they lose their stickiness over time. Instead of throwing them away, here’s the trick: revive those dried-out wraps with a simple process to extend their lifespan and keep them out of landfills.
So, why does this matter? By switching to beeswax wraps, you’re not just making a change for yourself; you’re supporting sustainability and joining the zero-waste movement. It’s a small step, but it can lead to some big changes for our environment.
Additionally, because beeswax wraps have natural antibacterial properties, they help maintain food freshness while being kind to the planet.
If you’re on the fence about trying them, give it a shot! You might find that once you start using beeswax wraps, you appreciate how they keep your food fresh and help you minimize your plastic use.
Signs Your Beeswax Wraps Need Reviving

Beeswax wraps are a popular choice for cutting down on plastic waste, but they aren’t meant to last forever. After about a year of regular use, you might start to notice that they don’t work as well as they used to. If your wraps are feeling limp and struggling to seal a bowl, that’s a definite sign they need some TLC. Plus, creases from bending and folding can make it tricky to get them to cling tightly around your food.
You might also pick up on lingering odors or just a general loss of stickiness. So, why does this matter? Keeping an eye on your wraps can help you address these issues before they become a big problem. A little maintenance can go a long way in extending the life of those wraps you either bought or crafted yourself.
Try this: Wash them gently in cool water with mild soap. Then, let them air dry completely. If they’re still feeling off, you can reapply some beeswax. You can even melt a block of beeswax in the oven on a baking tray, then dip your wraps in it to give them a fresh coat. Honestly, it’s pretty straightforward once you get the hang of it.
The best part is, reviving your wraps is not only good for your wallet, but it also means less waste going into landfills. So, take a moment to check on your beeswax wraps. Have you noticed any signs they could use a little revival? Using sustainable products like beeswax wraps aligns well with the ethos behind eco-friendly and reusable alternatives that help reduce plastic waste.
Recommended Products

100% PURE BEESWAX SHEETS – Beware of cheaper imitations! Some products may claim to be 100% beeswax but contain other non-natural waxes to cut costs. Our Toadily Handmade Beeswax Candle Kits includes beeswax sheets produced in the USA which guarantees 100% beeswax purity, ensuring the highest quality product and a clean burn.

𝐀𝐫𝐞 𝐘𝐨𝐮 𝐀 𝐅𝐚𝐧 𝐨𝐟 𝐁𝐞𝐞 𝐓𝐡𝐞𝐦𝐞𝐝 𝐆𝐢𝐟𝐭𝐬?Are you still looking for your dreamed bees wax made candles and no selection walk in your heart? So why not make one by yourself? Choose Lacaser Beeswax Candle Making Kit and hand made your favourite candles for your favourites.

ECO-FRIENDLY ALTERNATIVE: The WaxWrap Beeswax Roll offers a sustainable plastic wrap alternative, perfect for covering bowls, wrapping sandwiches, and storing snacks. These wraps can function as cheese paper for wrapping cheese or other produce, as well as the perfect beeswax wraps for bread.
Step-by-Step Guide to Reviving Your Beeswax Wraps

Reviving your dried-out beeswax wraps can be a real lifesaver. Instead of tossing them out, you can bring them back to life and save some cash in the process. Start by preheating your oven to 180°F and lining a baking sheet with parchment paper. This makes cleanup a breeze!
Before you dive in, give those wraps a good wash. Rinse them in hot water to get rid of any bacteria. Once they’re clean, lay them out flat on that baking sheet and sprinkle some beeswax pellets evenly over the fabric – this is your secret weapon for reviving them.
As you heat them up, keep an eye on the wraps. It usually takes about 1-2 minutes for the wax to melt. When you see that’s happened, carefully take them out. Hold the wraps by the corners and let them cool until they harden again. This little trick not only restores their stiffness but also boosts their sealing power, so you can keep using them for much longer.
So, why does this matter? It’s all about reducing waste while keeping more money in your pocket. If you’ve got beeswax wraps sitting around that you thought were done for, give this method a shot. You’ll be pleasantly surprised at how easy it is to bring them back!
In a nutshell, reviving your beeswax wraps is simple and effective. Next time you encounter dried-out wraps, remember this easy process. Have you tried reviving yours before? Give it a go! Using eco-friendly materials like beeswax helps reduce environmental impact while maintaining functionality.
Recommended Products

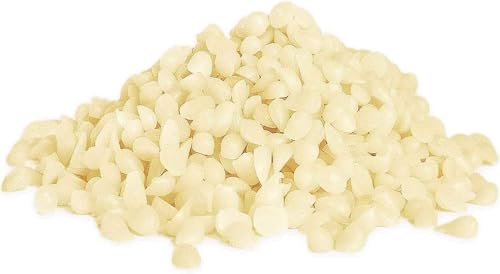
Yellow Beeswax is a natural wax formed by honey bees. The wax is discarded by the worker bees in or at the hive. The hive workers collect it and use it to form cells for honey storage. It becomes colored yellow from the pollen. Our 100% pure natural yellow beeswax is in pellet form, which makes working with it easy. Save time with no messy clean up from having to grate it.


PREMIUM 5 LB BEESWAX BLOCK: Ethical, 100% natural Texas Beeswax. Revered for its creamy texture, clean burning quality, enticing natural scents, and skin-soothing properties. Our pure, unadulterated beeswax block is perfect for a wide variety of household and cosmetic applications. Package includes a five-pound 9.5″ x 4.125″ x 3.5″ beeswax bar.
Alternative Revival Methods for Beeswax Wraps
Have you ever pulled out your beeswax wraps only to find they’ve lost their stickiness and charm? It’s frustrating, but there are ways to bring those little wonders back to life using some simple tricks.
Try this: One effective method is rubbing the wraps with a block of beeswax. It’s an easy way to add wax back and help revive their sticky surface. Alternatively, if you’re feeling a bit crafty, use a hot hairdryer to gently melt the wax on the wraps. It’s important to be careful though—too much heat can cause more harm than good.
Here’s another tip: grab your iron! First, lay the wrap between two pieces of parchment paper and set your iron to a low heat. Press down gently and watch the magic happen as the wax begins to melt and soak into the fabric. Before trying any of these methods, just make sure your wraps are clean and dry.
Cleaning with cool, soapy water before reviving them helps maintain the longevity of beeswax wraps.
These sustainable options can really extend the life of your beeswax wraps and help you cut down on plastic waste. Honestly, isn’t it nice to think about all the ways we can make our lives a little greener? What’s your favorite method for reviving something old into something useful again?
Recommended Products
Birthday Basket: Unique birthday gift for women included 10 pieces of handmade spa kit. Beautifully packaged and gift-ready for birthdays. There is real American hard work.

[Organic Beeswax] Our beeswax pellets come from organic bee farms and are triple filtered, free from any chemicals, and fully biodegradable as a natural product.

ORIGINAL COMPLETE GIFT SET – Give the gift of Skidmore's! Includes one 6 oz Leather Cream, one 6 oz Waterproofing, one Skidmore's applicator, and all conveniently pre-gift wrapped in a Skidmore's gift box.
When to Know Your Beeswax Wraps Are Beyond Repair?
How do you know when your beeswax wraps have finally hit the end of their life? If you’ve got noticeable tears or stubborn stains that just won’t come out, it’s probably time to part ways. Wraps that have lost their ability to cling tightly to your bowls or food, no longer shiny and fresh, are signs that they might be done for.
Also, those lingering food odors? They can signal that your wraps aren’t sanitary anymore, making them perfect candidates for responsible composting. Honestly, if they look limp and creased after a year of use, trying to repair them just isn’t practical. It’s a sign that they’ve served their purpose and it’s time for them to happily retire to the compost heap—not your kitchen.
So, what should you watch out for?
- Signs of wear like tears or discoloration.
- A lack of ability to stick to containers.
- Lingering smells that just won’t go away.
Knowing when to replace them is just as important as using quality wraps to help reduce waste. It can save you time and annoyance in the long run! Remember, every wrap has its limit. What’s been your experience with keeping them in tip-top shape?
Using certified compostable disposal methods, such as bags meeting BPI certification, ensures your worn wraps break down responsibly in compost systems.
Innovative Ways to Repurpose Old Beeswax Wraps
Have you ever wondered what to do with those old beeswax wraps cluttering your kitchen drawer? They’ve served their purpose, but don’t toss them just yet! There are plenty of creative ways to give them a new lease on life.
Try turning them into fire starters! Just shred the wraps into small pieces and mix them with your kindling. They’ll help get your fire going in no time. Alternatively, if you’re heading out for a snack, you can fold these wraps into eco-friendly snack bags. It’s a simple switch that helps you avoid single-use plastics.
If your wraps are a bit worn out, here’s a neat idea: use them as fabric patches for mending clothes. It’s a great way to extend their life and keep your favorite garments in rotation. You can also cut them into smaller pieces for reusable gift wrapping. It adds a personal touch to presents while being kind to the planet.
And don’t overlook their classic use. They still work wonderfully as protective covers for bowls or jars in your fridge. This keeps your food fresh without adding to plastic waste. For an even more eco-conscious kitchen, consider pairing these wraps with biodegradable cleaning options like Swedish dishcloths to reduce overall waste.
The Environmental Benefits of Reviving Beeswax Wraps
Reviving beeswax wraps is such a simple yet effective way to tackle the growing problem of single-use plastics. Have you ever stopped to think about how much plastic you throw away every week? By refreshing these wraps, you can stretch their life for another year or two, and that’s a win for both your wallet and the planet.
Try this: instead of tossing your beeswax wraps when they seem worn out, give them a little TLC. You’ll not only save money by avoiding constant purchases of new plastic wraps but also do your part in reducing environmental waste. When you engage in this kind of practice, it really reinforces a sustainable lifestyle. Honestly, every little action helps, right?
Joining in on the revival process can open opportunities for connecting with others who feel the same way. Community matters! Sharing tips and experiences on how to maintain those beeswax wraps is a great way to encourage everyone to think differently about waste. So, how can a simple wrap contribute to lessening your ecological footprint? It’s all linked to our everyday choices.
The best part? You can feel good about making a difference, one wrap at a time. It doesn’t take much, but the impact can be significant. Give it a shot and see how it fits into your routine! What steps will you take today to help the planet? Using reusable and compostable products like bamboo paper towels further boosts environmental benefits by reducing landfill waste.
How to Get Tips From the Beeswax Wrap Community
Where can you find more information about caring for your beeswax wraps? You can dive into the beeswax wrap community through social media groups and online forums. There are so many folks sharing their experiences and handy reviving tips that it’s almost like having your own support group.
Try this: consider attending local workshops. These events are a fantastic opportunity to learn directly from experts and other enthusiasts, and they often cover things you might not find online. Plus, you get to meet people who are just as passionate about sustainability as you are.
Don’t forget to follow blogs centered around zero waste living. They typically provide clear guides on how to maintain your wraps in great shape. Honestly, sites like Pinterest and Instagram are gold mines for creative DIY revival methods, too! You might discover a few techniques you would never think of on your own.
Joining mailing lists from beeswax wrap makers can give you some real insider tips, along with handy restoration tutorials. It’s amazing what you can learn from the community. Engaging with others makes it so much easier to revive your wraps—and you might even enjoy the process a little more.
Additionally, exploring sustainable practices, such as using reusable materials for gift bags, can complement your beeswax wrap care routine and promote an eco-friendly lifestyle.
Recommended Products

✔ 100% PURE & NATURAL : Cosmetic/USP Grade, Premium Quality, Triple Filtered Grade A Beeswax

Beeswax Candle Making Kit, the perfect DIY craft gift for adults and kids alike! kit comes with all the candle making supplies you need, including 24 packs 10x8 inch 240 inch wick, beeswax sheets, making it easy and convenient for you to create your very own beeswax candles right at home.
What to Use Instead If Your Wraps Are Beyond Repair?
Sometimes, no matter how much you try, those beeswax wraps just won’t cooperate anymore. So, what do you do when your wraps are past their prime? You’ve got some solid alternatives to keep your food fresh and cut down on waste.
Reusable silicone food covers are a lifesaver. They can seal containers tightly, just like wraps, but without the hassle of needing to re-treat them. If you’re looking to be more sustainable, compostable food packaging options like waxed paper or biodegradable cling films are a great choice. These help reduce plastic waste and are handy for all sorts of food items.
For storing leftovers, consider investing in good-quality stainless-steel or glass containers. They last a long time and do a fantastic job of keeping your food fresh. If you’ve got certain foods that just need a little cover, try using damp paper towels; they can be surprisingly effective.
For a touch of charm in your kitchen, you might love fabric bowl covers made from cotton with elastic edges. Not only are they breathable and practical, but they also add a bit of flair to your dining table.
To maximize freshness and organization, consider using airtight glass jars for bulk storage or pantry staples as an eco-friendly alternative.
Recommended Products

QUICKLY DRY OFF CUPS: Speed up cleanup! Featuring diamond-shaped cutouts, these bar mats are perfect for promoting airflow to expertly dry off glassware after washing.

Enhanced collagen production capability significantly reduces fine lines, wrinkles and redness, for younger-looking skin.
1.9L MINI SCUBA TANK:This 1.9L mini scuba tank is easy to carry anywherea mere 7.98 lbs, . It provides about 200 bar /115 breaths of underwater breathing time, meeting your needs for shallow-water activities. Equipped with an extended night vision pressure gauge, you can check remaining gas at any time underwater, and the adjustable diving vest frees your hands for more flexible movement
Frequently Asked Questions
How to Rejuvenate Beeswax Wraps?
To rejuvenate beeswax wraps, we can use various beeswax wrapping techniques. Mixing DIY beeswax recipes or exploring eco-friendly alternatives guarantees effective food preservation. Regular beeswax wrap care enhances sustainable living ideas while extending the wraps’ lifespan.
How to Fix Dried Out Beeswax?
We can fix dried-out beeswax by melting and reapplying it, maximizing its benefits for sustainable living. Let’s explore eco-friendly wraps and beeswax alternatives that enhance natural food storage and their versatile applications!
How to Soften Hard Beeswax?
To soften hard beeswax, we can gently heat it, embracing its natural properties like a warm hug. This eco-friendly method supports sustainability in our DIY projects and enhances food storage, offering us delightful alternatives for modern living.
How to Make Bees Wrap Sticky Again?
We can make beeswax wraps sticky again by heating them in the oven or using a hairdryer. These kitchen tips help maintain that sticky texture, enhancing our sustainable living and DIY projects for longer-lasting wraps.