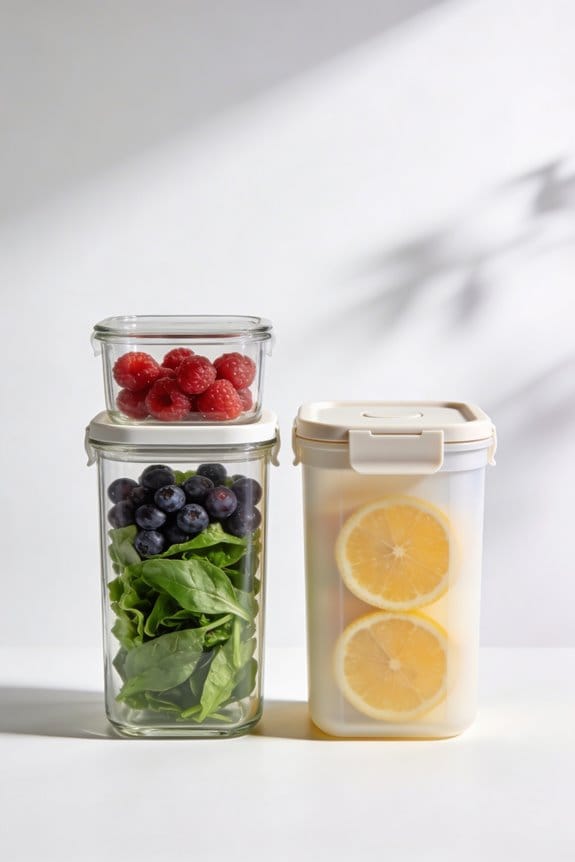
Fermentation is a fun and healthy way to preserve vegetables. It’s simple: we just need clean glass jars, like mason jars, and a 2% salt solution. First, wash and prepare our veggies, then pack them tightly in the jars. Make sure they’re submerged in the brine to avoid spoilage. After a few days, we can check for bubbles and taste for tanginess. If we follow the steps, we’ll have flavorful, gut-friendly veggies to enjoy. Let’s explore more!
Key Takeaways
- Fermentation is the process where good bacteria convert sugars into acids, preserving food and enhancing gut health with probiotics.
- Use clean glass jars and fermentation weights to create an anaerobic environment, crucial for successful fermentation.
- A 2% salt concentration is ideal to manage fermentation and prevent spoilage while enhancing flavor.
- Monitor the fermentation process by looking for bubbles and tasting to achieve desired tanginess and saltiness.
- Utilize fresh, firm seasonal vegetables for better fermentation results, and experiment with recipes to enjoy your pickled creations.
What Is Fermentation and Why It Matters?
Have you ever wondered how a few simple ingredients can turn into something so flavorful and good for you? That’s the magic of fermentation. It’s a fascinating biological process where good bacteria take sugars and turn them into acids. You’ll spot this transformation in tasty fermented veggies like sauerkraut and kimchi.
Lactic acid bacteria are the unsung heroes here. They create an anaerobic environment that keeps those foods from spoiling. It’s pretty easy to get started with just a 2% salt concentration, which helps you manage the fermentation process without much fuss.
So, why does this matter? For one, fermentation not only preserves food but also boosts nutrient availability. Those probiotics you’ve heard about? They’re a big part of why fermentation is fantastic for your gut health. The best part is that you don’t need a fancy setup; the ideal temperature for fermentation is between 16-18°C (60-65°F). Keeping this range helps prevent spoilage, especially in warmer conditions.
Using glass jars for fermentation is ideal because they are non-reactive and allow you to easily monitor the process.
Want to give it a shot? Embrace the world of fermentation, and you’ll find yourself with delicious, healthy foods that last much longer than their non-fermented counterparts. Frankly, who wouldn’t want flavorful dishes that are also good for you?
Essential Supplies for Successful Fermentation
When you decide to dive into fermentation, it can feel a bit overwhelming. But trust me, having the right supplies makes a world of difference. You’ll want some clean glass jars, like mason jars, to create that cozy, oxygen-free environment necessary for fermentation.
Fermentation weights are crucial too. Whether you use glass stones or a small, clean baby food jar, these little helpers keep your veggies submerged beneath the brine. This is key since it helps prevent air exposure and mold growth. Now, let’s talk salt. High-quality sea salt or kosher salt is essential here; it boosts flavor and keeps nasty bacteria at bay. And don’t forget about fermentation lids or airlocks. They let gases escape while keeping oxygen out—pretty important for the process.
A kitchen scale is another handy tool you shouldn’t overlook. It lets you precisely measure your veggies so you can aim for about a 2% salt concentration based on their weight. This little trick results in a tasty brine. To maintain the best quality during fermentation, consider using containers with airtight sealing features that help block air and moisture effectively.
Recommended Products
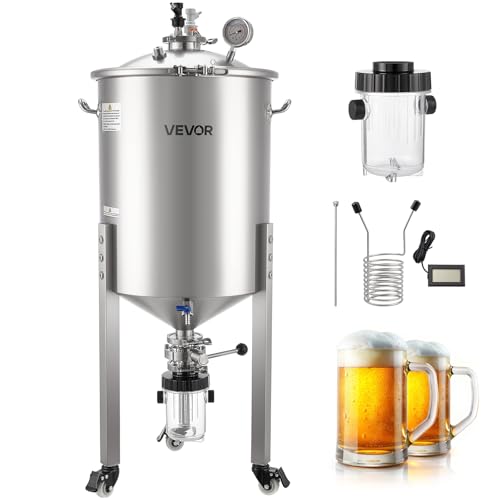
Pressure Fermentation: This stainless steel conical fermenter features a pressure design to avoid CO₂ overflow during fermentation. Real-time pressure monitoring ensures stable secondary fermentation and richer flavor. It includes a yeast bottle for consistent results

Great Starter Equipment Kit for Winemaking.

Versatile glass Mason jars for canning and crafting
Let’s Get Your Veggies Ready for Fermentation

Getting veggies ready for fermentation is such an exciting part of the process, isn’t it? There’s just something about preparing fresh produce that feels rewarding. To kick things off, the first step is to wash and dry your veggies really well. Trust me, wet vegetables can spoil way quicker than you’d think, so it’s best to take the time to get them nice and dry.
Next, you’ll want to cut or shred the veggies into uniform pieces. This little trick helps ensure that all your vegetables ferment evenly in the Mason jar. And here’s where it gets a bit more technical: you’ll need to create a salt brine by measuring out 2% of the total weight of your veggies in salt. This ratio is key for that yummy, tangy flavor.
When it comes to packing the jar, don’t be shy—get those veggies in there tight! Press them down to release any air pockets. This not only helps in fermentation but also keeps everything submerged, which is super important. Leave about 3 cm of headspace at the top of the jar. Why? This space allows for gas expansion during fermentation, which keeps your veggies in tip-top shape. Using airtight containers like Mason jars can help maintain proper conditions throughout the fermentation process.
Recommended Products

BAKE ON YOUR SCHEDULE – No more planning your day around starter feedings. The Sourdough Home lets you feed your starter weekly or daily. Increase the temperature for daily baking, and decrease the temperature for weekly or infrequent baking.

Enough for Home Use: the package will provide you with 12 pieces of amber mason canning jars 64 oz wide mouth and 12 pieces of lids, measuring approx. 64 oz in capacity and approx. 11.5 x 23.4 cm/ 4.53 x 9.21 inches in size, enough for your household use

FRESHNESS ASSURED. Up to 80% oxygen removed; no other pump matches this. Our revolutionary manual hand pump jar vacuum sealer for mason jars ensures 2-4X longer freshness, slashing food waste and saving you money. **Wide Mouth Jars Only**
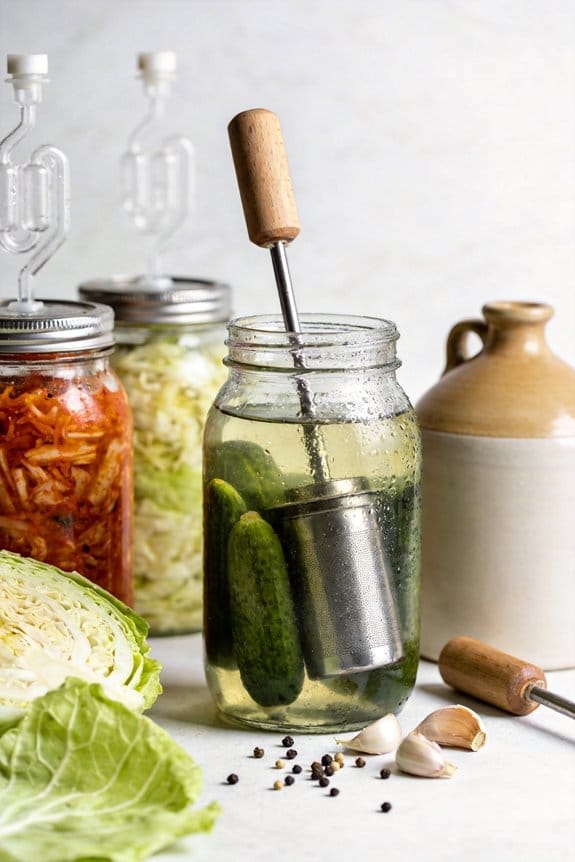
How to Set Up Your Fermentation Jar
Starting your fermentation journey can be a bit intimidating, right? You want to get it just right to avoid dodgy bacteria messing things up. The first thing you need is a clean glass jar—this is your base.
To kick things off, sterilize that jar. This step is crucial because it helps keep bad bacteria at bay and gives your fermentation the best shot at success. Once your jar is squeaky clean, it’s time to pack in your prepared veggies. Try to fill the jar tightly, but remember to leave about a 3 cm gap at the top. You don’t want to run into any issues with gas expansion during fermentation, so this space is key.
Next up is the salt brine. Here’s the trick: mix about 3 tablespoons of fine salt for every quart of water. This tasty brine is essential for preserving those crunchy, fermented delights. By the way, did you know keeping the veggies submerged is important? You can do this by adding a weight or even some cabbage leaves on top.
Now, let’s talk about sealing the jar. You want to do it loosely—fermentation lids work great for this. This way, gases can escape while keeping oxygen out, which is crucial for the fermentation process.
Using natural cleaning methods for your fermentation jar ensures a safe and effective preparation for the best results.
Getting started is easier than you think! You just need the right steps to create your own delicious fermented treats at home. What flavors are you excited to experiment with?
Recommended Products

The product can keep your kitchen in organized and your foodstuff fresh and appealing. The sealed lid is easy to open and close, which can bring convenience to you.

These jugs cater to home brewers, brew pubs, and breweries alike. Ideal for fermenting small batches of beer, wine, kombucha, lemonade, tea, juice, milk, water, and beyond!

Versatile for your kitchen, whether as a preserving jar or glass container with lid: the Weck cylinder glass with 3000 ml volume brings order and enjoyment to your everyday life.
How to Know When Your Ferment Is Successful?
Once you’ve packed your jar and sealed it up, what’s next? Keep a close eye on your ferment. You’ll know it’s going well when you start to see visible bubbles, usually popping up within the first few days. Those bubbles are a good sign of active fermentation, so give yourself a little pat on the back for getting it right!
Regularly tasting your ferment is key. You want it to develop a tangy flavor that balances saltiness and acidity—this usually hits its peak around 8 to 10 days. Don’t forget to check your brine; it should remain clear. If you notice any surface mold, you can carefully remove it. Proper packing is important here; it helps prevent air pockets that can throw off the fermentation process.
Keeping the temperature between 16-18°C is essential for the best results. If you don’t see any bubbles, it might be time to reassess your process. What went wrong?
Additionally, using eco-friendly practices like glass jars helps preserve flavor and reduce waste in your fermentation journey.
Happy fermenting! Trust the process, and enjoy the journey of making your own delicious treats. What flavor are you hoping to achieve?
Troubleshooting Common Fermentation Issues
Fermentation can feel like an adventure, but let’s be real—it doesn’t always go as planned. Ever peeked into your jar and noticed it’s quiet? No bubbles, no fizz? That could be a sign that the temperature is too chilly. If that’s the case, don’t fret. Just give it a few more days, and hopefully, you’ll see some activity.
Sometimes, the seal on your jar could be worn out. A shaky seal can let gases escape, which means your ferment might not be doing its thing as it should. Check that seal!
Now, if your concoction is tasting a bit too salty, take a chill pill. Just let it sit for a while longer. The flavors have a funny way of balancing out when given some time.
And here’s a big one: if you spot mold or strange yeast growing on top because your veggies weren’t fully submerged, don’t panic! It’s totally manageable. Just remove the surface stuff carefully, and as long as those submerged veggies are untouched, you’re still in good shape.
Keeping your fermentation tools clean is super important. Sanitize everything before you start to keep any harmful bacteria at bay. After all, enjoying the health benefits of your homemade goodness matters, right?
Using biodegradable formulas for cleaning your tools ensures safety and environmental care during the fermentation process.
Recommended Products

{Healthy Flock} Proper nutrition and a well-balanced microbiome can help your poultry defend against dangerous pathogens. Brewer's Yeast with Probiotics, Prebiotics and Niacin can help achieve exceptional health in your flock

Solid 304 Stainless Steel with no seams on the interior.

made of exquisite craftsmanship and materials, has excellent practicality, and can be sealed and stored well.
Tips for Choosing the Best Vegetables to Ferment
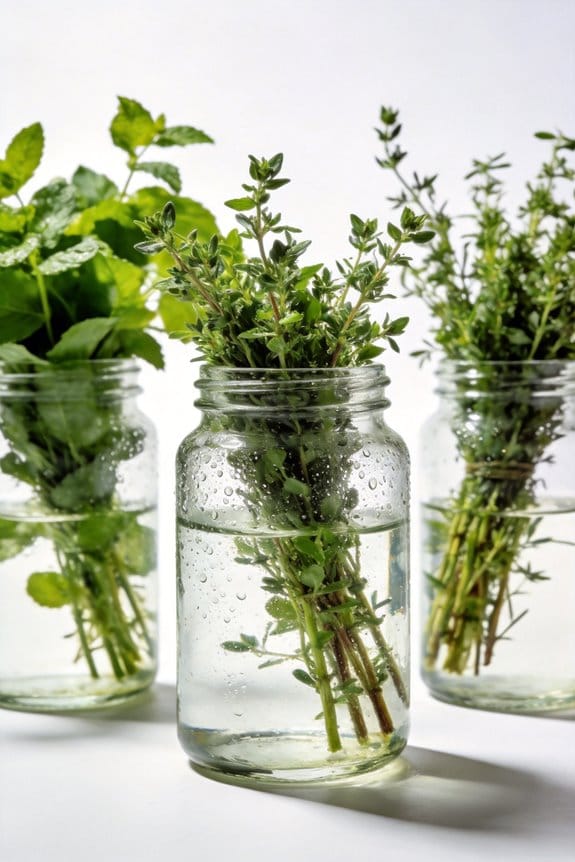
Ever wonder which vegetables you should pick for fermentation? It’s all about choosing fresh and firm veggies. Think cabbage, cucumbers, and carrots—these guys hold their texture and flavor well throughout the process. And don’t overlook high-sugar veggies like beets and carrots; their natural sugars are a bonus since they help bacteria create lactic acid while fermenting.
Try this: always go for seasonal produce. Not only does it tend to be fresher, but it also packs a lot more flavor, leading to quality ferments. Nobody wants to waste time with wilted or damaged vegetables; they can bring unwanted bacteria into the mix.
When you’re preppin’ your veggies, make sure to cut them into uniform sizes. This helps them fit snugly in the jar, which is key for reducing air pockets that can mess with the fermentation process. Using glass jars for fermentation is ideal because they are non-reactive and help maintain the quality of your ferment.
Recommended Products

PREMIUM HPS GROW LIGHT - Our TBG 150-Watt Light with 18,200 Lumens is ideal for ALL STAGES of growth; Low energy consumption along with a high reflective hood means your plants receive the optimal spectrum of light. 150w output incentivizes low cost for the home. Perfect for first-time growers!

This Serious Skincare Treatment Infuses The Skin with Sumptuous Moisture, Helping Break The Cycle Of Dryness And Dehydration

【Unlock Homemade Yogurt】Multifunctional yogurt maker machine for homemade yogurt, natto, fermented dough, and more. With 8L/12L large capacity, it’s great for families, bakeries, or small businesses. One appliance replaces multiple fermentation tools—effortlessly craft a variety of probiotic-rich foods with smart temperature control and preset programs.
Recipes Using Your Fermented Vegetables
Are you wondering how to spice up your meals with those tasty fermented veggies sitting in your fridge? They can really add a punch to your dishes, and it’s easier than you think! Consider tossing some fermented pickles onto your sandwiches or wraps for that tangy flavor that sets them apart. They can bring so much to salads, giving that extra crunch and a delicious depth of taste. Plus, they make fantastic toppings on tacos or grain bowls, making your meals look and taste vibrant.
Want to know a secret? The acidity from those fermented veggies can work wonders in soups and stews, enhancing all the flavors beautifully. And if you’re looking for a fun snack, try blending them into dips like zesty hummus. It not only tastes great but also packs in those probiotics—talk about a bonus! For breakfast, think about adding a sprinkle to your omelets or scrambled eggs. It’s a simple way to elevate your morning routine.
Here’s a fun idea: whip up a fermented vegetable stir-fry! Combine them with fresh veggies and your choice of protein for a colorful, nutritious meal. You can get as creative as you like. The best part is that you’re not just enjoying your fermented veggies now—you’re also making sure they don’t go to waste. Consider storing any leftovers in eco-friendly containers to maintain freshness and reduce environmental impact.
Frequently Asked Questions
Can I Ferment Fruits in Addition to Vegetables?
Absolutely, we can ferment fruits! Picture jars brimming with vibrant colors; popular choices include apples and berries. The benefits of fruit fermentation enhance nutritional value, while techniques like brining reveal delicious flavors and probiotics. Let’s explore together!
How Long Will My Fermented Vegetables Last?
Fermented vegetables can last several months if stored correctly. We should monitor storage conditions, and always check for signs of spoilage. Following best practices during our fermentation timeline keeps our veggies fresh and safe!
Is Fermentation Safe for Everyone to Consume?
Fermentation’s generally safe for most of us, though we should be mindful of food allergies. It offers gut health benefits and can even be suitable for toddlers, bringing delicious flavors and nutrition to our meals together.
Can I Add Spices to My Fermentation Jar?
Absolutely, we can add spices to our fermentation jar! By experimenting with various spice combinations, we enhance flavor profiles, boost fermentation benefits, and guarantee a delightful taste enhancement that makes our preserved vegetables truly remarkable.
What Should I Do With Leftover Brine?
We can save leftover brine in a sealed jar for future use! It’s perfect for seasoning soups or marinades. Let’s experiment with creative brine uses and even try brine recipes for added flavor enjoyment!